Testing
This document will be most useful for developers that want to contribute to WPGraphQL and want to run tests locally.
In order to run tests, you must clone the monorepo from GitHub. The WPGraphQL plugin is located at plugins/wp-graphql/ in the repository. Downloading from Composer or Packagist will not include the dev dependencies needed to run tests.
Note: WPGraphQL is now a monorepo. For detailed testing instructions, see the Testing Guide in the repository root.
Testing with wp-env
The easiest way to run tests is to use the included wp-env setup. This uses Docker to create a local WordPress environment with WPGraphQL installed as a plugin.
Prerequesites
- Node.js 22+ and npm >= 10 (NVM recommended)
- Docker
- Git
Installation
-
Clone the repository:
git clone [email protected]:wp-graphql/wp-graphql.git cd wp-graphql -
Install the NPM dependencies (from the repository root):
## If you're using nvm, make sure to use the correct Node.js version: nvm install && nvm use ## Then install the NPM dependencies: npm install -
Start the
wp-envenvironment to download and set up the Docker containers for WordPress:npm run wp-env startWhen finished, the WordPress development site will be available at http://localhost:8888 and the WP Admin Dashboard will be available at http://localhost:8888/wp-admin/. You can log in to the admin using the username
adminand passwordpassword.Composer dependencies are automatically installed when the environment starts.
-
(Optional) Manually install Composer dependencies:
## To install Composer dependencies inside the Docker container:
npm run wp-env -- run tests-cli --env-cwd=wp-content/plugins/wp-graphql/ -- composer install
Custom Test Environments
If you need to customize the wp-env environment (for example to add additional plugins, or change PHP versions), you can do so by creating a .wp-env.override.json file in the root of the plugin.
For example:
{
  "core": "WordPress/WordPress#6.5", # To use a specific version of WordPress
  "phpVersion": "8.1", # To use a specific PHP version
}
For more information on using and overriding wp-env settings, see the @wordpress/env package documentation.
Running the Tests
To access Codeception and run tests inside the wp-env Docker container, use the following commands from the repository root:
## WPUnit tests
npm run -w @wpgraphql/wp-graphql test:codecept:wpunit

## Acceptance tests
npm run -w @wpgraphql/wp-graphql test:codecept:acceptance

## Functional tests
npm run -w @wpgraphql/wp-graphql test:codecept:functional
For example:
## Run all WPUnit tests
npm run -w @wpgraphql/wp-graphql test:codecept:wpunit

## Just a single test file
npm run -w @wpgraphql/wp-graphql test:codecept:wpunit -- tests/wpunit/AccessFunctionsTest.php

## Or a single test within a file
npm run -w @wpgraphql/wp-graphql test:codecept:wpunit -- tests/wpunit/AccessFunctionsTest.php:testCustomScalarCanBeUsedInSchema

## With verbose debugging
npm run -w @wpgraphql/wp-graphql test:codecept:wpunit -- --debug

## With a specific theme
TEST_THEME=twentytwentyfive npm run -w @wpgraphql/wp-graphql test:codecept:wpunit
Smoke Tests
Smoke tests are lightweight tests that verify the plugin works correctly without running the full test suite. They’re useful for quickly validating builds.
## Run smoke tests against a running WordPress environment
./bin/smoke-test.sh

## With a custom endpoint
./bin/smoke-test.sh --endpoint http://wpgraphql.local/graphql

## With verbose output
./bin/smoke-test.sh --verbose
Smoke tests verify:
- GraphQL endpoint responds
- Introspection works
- Basic queries (posts, pages, users, etc.) work
- Site settings are accessible
Testing the Production Zip
To test the actual production zip artifact (mimicking CI), you need to install the plugin via WP-CLI rather than mounting it via wp-env. See the Testing Guide for detailed instructions.
Testing Locally with Codeception
On some machines, running tests directly with Codeception may be faster than using Docker. If for performance or any other reasons you want to run tests directly on your machine, you can follow the instructions below.
Pre-requisites
- Command line access
- PHP 7.4+ installed and running on your machine
- MySQL installed and running on your machine
- Composer
Install WordPress Test Environment
WPGraphQL includes a script to install a local test environment, using the environment variables you provide in a .env file.
-
Navigate to the WPGraphQL plugin directory:
cd plugins/wp-graphql -
Copy the
.env.distfile to a new file named.envand update variables to match your local database setup. -
Run the test environment setup script:
composer install-test-envThe script will download and install a local WordPress installation in the provided directory, set up the database, and install WPGraphQL.
Configure Test Suites
Within the plugins/wp-graphql/tests/ directory are the Codeception .yml configuration files.
To run tests locally, copy the .yml file for the test suite you want to run and rename it without the .dist.
For example:
- copy:
wpunit.suite.dist.ymltowpunit.suite.yml
Then update the details of the .yml file to point to your local database by changing the fields:
- dbName
- dbHost
- dbUser
- dbPassword
The other fields should be able to remain the same, but update as necessary.
Install Composer Dependencies
Run the following from the WPGraphQL plugin directory (plugins/wp-graphql/):
composer install
This installs the dev dependencies needed to run the tests.
Run the tests
To run the tests from the plugin directory, use the following commands (you can use control + c to exit):
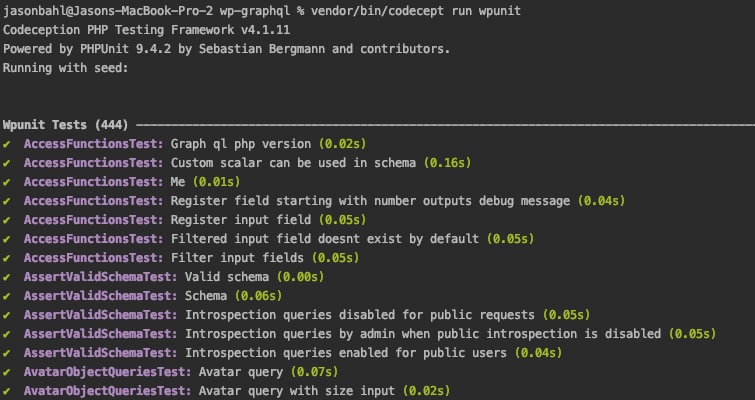
vendor/bin/codecept run wpunit
This will run all of the tests of the wpunit suite.
To run an individual test file, you can specify the file like so:
vendor/bin/codecept run tests/wpunit/AccessFunctionsTest.php
Or you can specify one specific test like so:
vendor/bin/codecept run tests/wpunit/AccessFunctionsTest.php:testCustomScalarCanBeUsedInSchema
The tests should start running and you should see something similar to the following: